Paper Flowers for Weddings: Where They Work Best
A plain guide to deciding where paper flowers fit in handmade wedding decor: their strengths and limits, the best placements, which paper to choose, and one easy rolled rose to try first.
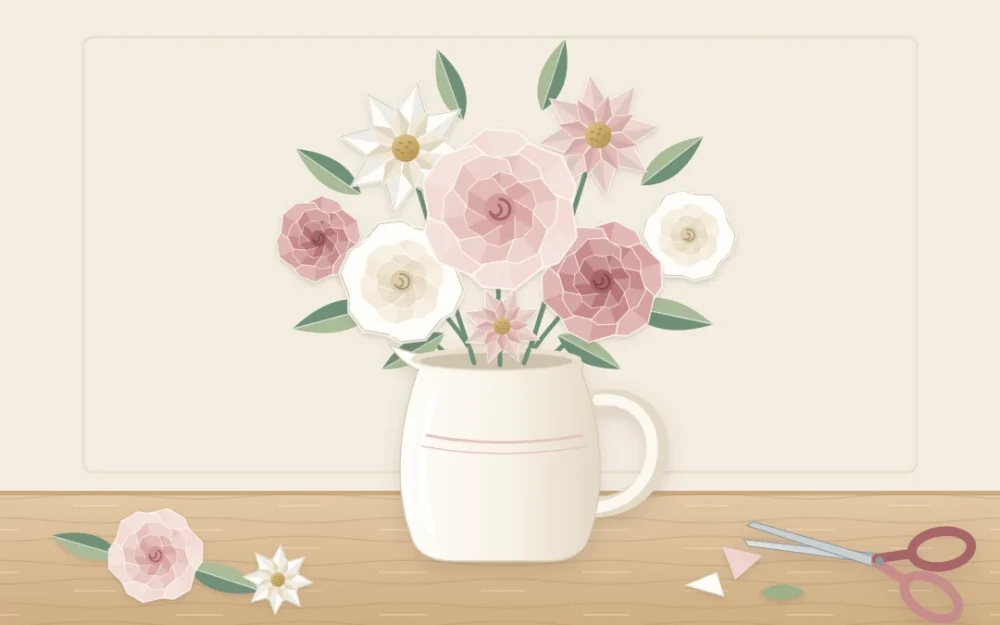
Paper flowers solve a real problem: almost every other handmade decoration can be finished early, but fresh flowers cannot. Choosing paper flowers for weddings lets you move part of the floral work out of the last two days and into the months before.
They are not the right answer everywhere, though. This guide looks at where paper blooms earn their place, where fresh flowers still do the job better, which paper to choose, and one easy flower to try before you commit.
What Paper Flowers Do Well
- They can be made months ahead. There is no wilting and no water, so the work spreads over many relaxed evenings.
- The color is exactly what you choose. You are not limited by season or by what happens to be available that week.
- They travel well. Packed in boxes, they arrive looking as they did when you made them.
- They work at any scale. A bloom the size of a coin and one the size of a dinner plate use the same basic methods.
- They last. Afterward, a few can be kept in a frame or a vase as a keepsake.
Where Fresh Flowers Are Still Better
Paper has limits, and it helps to be honest about them before you start cutting.
- Close-up, hand-held pieces. A bouquet is seen from inches away and handled all day. Fresh flowers have scent, movement and a softness paper cannot quite match.
- Damp or windy outdoor settings. Paper droops in mist and rain, and light pieces blow about.
- Large volumes on short notice. A convincing paper peony can take an hour. Fresh stems fill a jar in minutes.
- Anywhere near flames. Paper burns easily. Keep paper flowers well away from any real flame and use LED candles on decorated tables.
The Best Places to Use Them
Backdrop accents
A cluster of paper blooms at the top corner of a ceremony or photo backdrop reads clearly from a distance and weighs very little. They pair naturally with a ribbon and fabric curtain backdrop.
A photo wall with oversized blooms
Three to five large flowers of 10 to 16 in (25 to 40 cm) across make more impact than dozens of small ones. Keep them light, fix them with removable hooks or to a freestanding frame, and ask the venue what may be attached to its walls.
Around the cake table
Scatter paper flowers along the front edge of the table or around the base of the stand. Keep them off the cake itself and away from anything guests will eat.
Centerpiece fillers
A few paper blooms on wire stems fill out a jar of dried grasses or greenery and need no water. See the collection of handmade centerpiece ideas for arrangements they suit.
Garlands
Small flat flowers glued to twine every few inches make a light garland for a table front or a mantel.
Boutonnieres and gift toppers
One small rose with a paper leaf is enough. The steps for a handmade boutonniere show how to bind it to a stem; the same flower glued to a ribbon knot dresses a wrapped gift or a favor box.
Which Paper for Which Flower
Three kinds of paper cover nearly every use. The difference is how much shaping each one accepts.
| Paper | Best for | Keep in mind |
|---|---|---|
| Light cardstock, about 65 lb | Rolled roses, layered flat flowers, oversized wall blooms | Holds its shape well; curls over a pencil but will not stretch |
| Crepe paper | Realistic petals for peonies, roses and ranunculus | Stretches into cupped shapes; fades in sun and marks if it gets wet |
| Text-weight paper | Small blossoms, garland flowers, fringed centers | Quick to cut in stacks; too soft for large petals |
Heavy cardstock of 80 lb or more is best kept for bases and leaves, since it cracks when rolled tightly. If cardstock weights are new to you, the guide to cutting and scoring cardstock explains them in plain terms.
A Starter Flower: The Rolled Spiral Rose
This rose needs only light cardstock, scissors, a pencil and tacky glue, and it is the quickest way to find out whether you enjoy the work.
- Draw a circle about 4 in (10 cm) across by tracing around a mug or a jar lid, and cut it out.
- Starting at the edge, cut a spiral toward the middle, keeping the strip about 1/2 in (1.3 cm) wide. Stop when a small round pad of about 3/4 in (2 cm) is left at the center.
- For a softer petal edge, cut the spiral with a gentle wavy line.
- Beginning at the outside end, roll the strip tightly around itself toward the center, keeping the bottom edge level.
- Set the roll down on the center pad and let it loosen until it looks like an open rose.
- Lift the coil, spread tacky glue over the pad, press the coil back onto it and hold for about a minute.
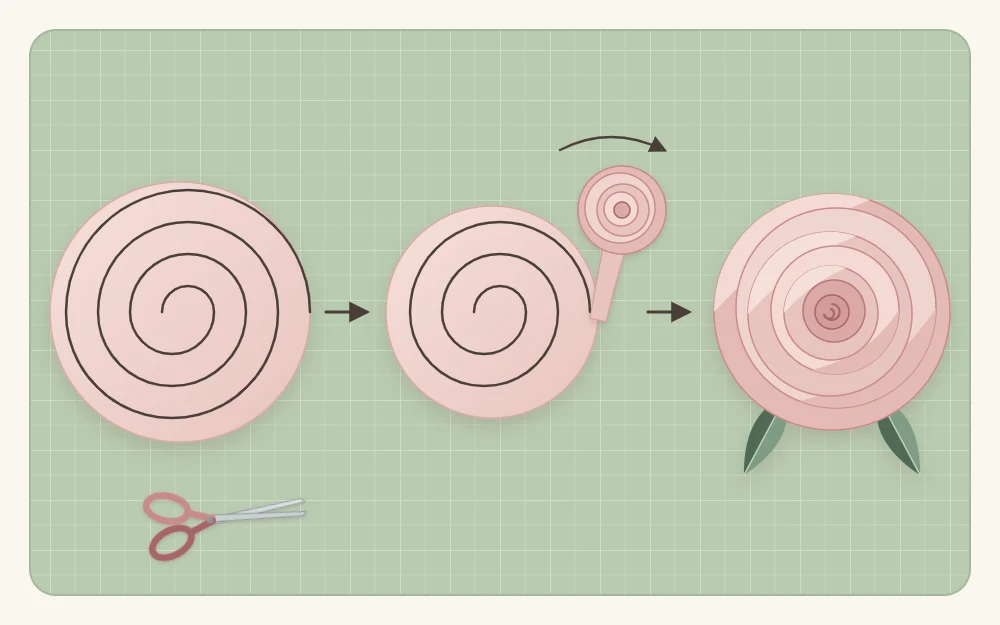
A 4 in circle gives a rose of roughly 1 1/2 in (4 cm) across. A larger circle makes a larger rose; a wider strip makes a taller one. Two circles of this size fit across a letter-size sheet and two rows fit down it, so one sheet yields four roses, with offcuts left for leaves.
Tip
Make one rose from scrap paper first. If the coil springs open too far, roll it more tightly or hold it for a few seconds longer before letting go.
How Many to Make, and When
Count by placement, not by a single total. Write down each spot where paper flowers will go and how many it needs, then add about ten percent for flowers that get crushed.
Time one flower from start to finish and multiply. Thirty small roses at about five minutes each is roughly two and a half hours, which is one evening. A dozen detailed crepe blooms may take several.
Storing and Transporting Paper Flowers
Finished flowers can be kept for months if they stay dry, shaded and uncrushed.
- Use rigid boxes with lids, and lay flowers in a single layer or separate layers with tissue paper.
- Store stemmed flowers upright in a tall box, or pushed into a block of foam so the heads do not touch.
- Keep boxes away from windows, since sunlight fades crepe and colored cardstock.
- Avoid basements, bathrooms and garages, where damp softens paper and loosens glue.
- Carry the boxes flat and bring tacky glue for small repairs when you set up.
Frequently asked questions
How far ahead can I make paper flowers?
As far ahead as you like, within reason. Flowers made several months early look the same later, provided they are stored in lidded boxes somewhere dry and out of sunlight. Crepe paper fades faster than cardstock in bright light, so keep those boxes closed until you set up.
Do paper flowers look cheap?
They look best when they are not pretending to be fresh. Used as bold backdrop accents, garlands or fillers in a limited palette, they read as deliberate handmade decor. Neat cutting, consistent colors and hiding glue matter more than complicated petal shapes. A few well-made blooms beat many rushed ones.
Can paper flowers be used outdoors?
On a dry, calm day they are fine, especially under cover. Damp air softens paper, rain ruins it, and wind moves lightweight pieces around, so have a covered spot planned and fix each flower firmly. Put them out as late as you can and keep them out of strong sun.