DIY Wedding Backdrop: A Ribbon and Fabric Curtain
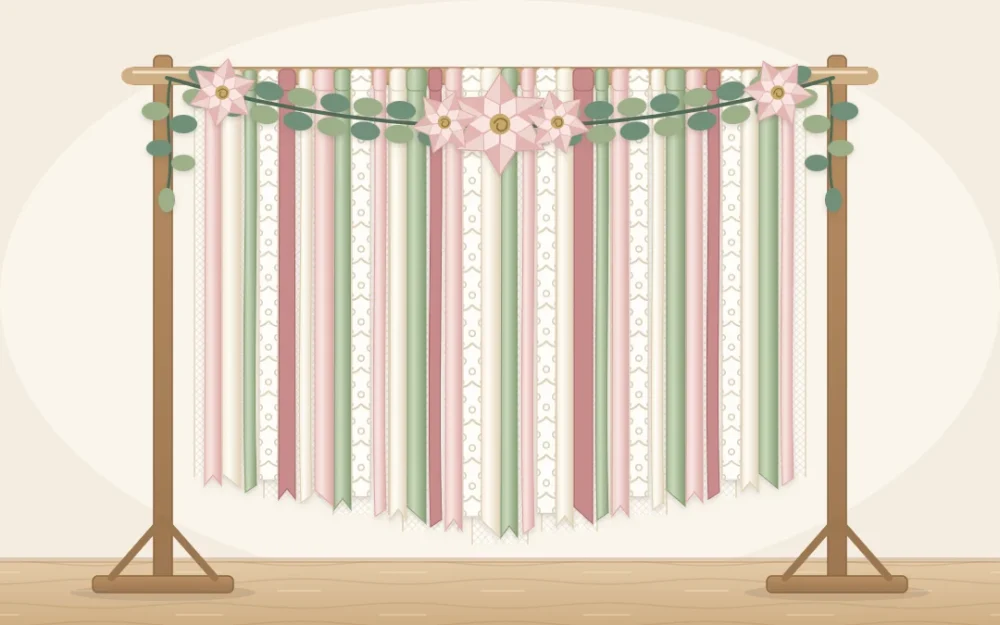
Tie a light ribbon and fabric curtain backdrop about 6 ft wide on a wooden dowel, with strip lengths, quantities, a layering order and two ways to trim the hem.
Project at a glance
Materials
- Wooden dowel about 1 in thick and 7 ft long
- 60 yd of tulle or organza, 6 in wide
- 5 yd of light cotton or muslin
- 60 yd of ribbon in mixed widths
- Faux or fresh greenery for the top
- Sharp scissors, tape measure and pencil
A curtain of ribbon and fabric strips is one of the lightest backdrops you can make. It rolls up around its own pole, travels in a car and moves gently in the air, which makes a plain wall or an open lawn look finished. This diy wedding backdrop is tied, not sewn, so the only real skills are cutting and knotting.
The version below is about 6 ft (1.8 m) wide with strips that hang about 7 ft (2.1 m), enough to frame two people standing. The same method scales to any width.
What You Need
- Top bar: a wooden dowel about 1 in (2.5 cm) thick and 7 ft long, which leaves bare wood at each end to rest on its supports. A tension rod can replace it for a light, sheer curtain inside a doorway or alcove.
- Sheer layer: 12 strips of tulle or organza about 6 in (15 cm) wide.
- Soft layer: 12 strips of light cotton or muslin about 2 in (5 cm) wide.
- Ribbon layer: 12 ribbons in mixed widths, from 5/8 in (16 mm) to 1 1/2 in (4 cm).
- Sharp scissors, a tape measure and a pencil.
How Long to Cut the Strips
Each strip is folded in half over the bar, so it has to be twice as long as the finished curtain. For a 7 ft drop, cut every strip about 15 ft, which is 5 yd (4.6 m): two tails of 7 ft, plus roughly 1 ft (30 cm) that disappears into the knot and the final trim.
Thirty-six strips are spaced about 2 in apart across 72 in of bar. That gives these totals:
- Tulle: 12 strips of 5 yd is 60 yd (55 m). Tulle sold on 6 in spools needs no cutting to width.
- Cotton: one piece 5 yd long. Snip the edge every 2 in and tear down the length; 12 strips use only 24 in (61 cm) of the width.
- Ribbon: 12 lengths of 5 yd is 60 yd in total, split across your colors.
For another size, divide the width in inches by two to get the number of knots, share them equally among the three materials, and cut each strip to twice the drop plus 1 ft.
Keep the Colors to Three or Four
A curtain with many strips looks calm only when the colors are limited. Choose one neutral for the sheer layer, such as ivory or white, and two or three colors for the cotton and ribbon. If you have not settled on them yet, the guide to building a small craft color palette explains how to pick a main color, a supporting color and an accent.
Vary texture more than color. Matte cotton, shiny satin and see-through tulle in the same blush look richer together than six unrelated shades.
Tie the Strips From the Center Outward
Rest the bar across two chair backs at a comfortable working height and let the tails pool on a clean sheet. Every strip goes on with a lark’s head knot, the same knot used for a no-sew fabric strip garland.
- Mark the middle of the bar in pencil, then mark 36 in (91 cm) to each side. These are the edges of the curtain.
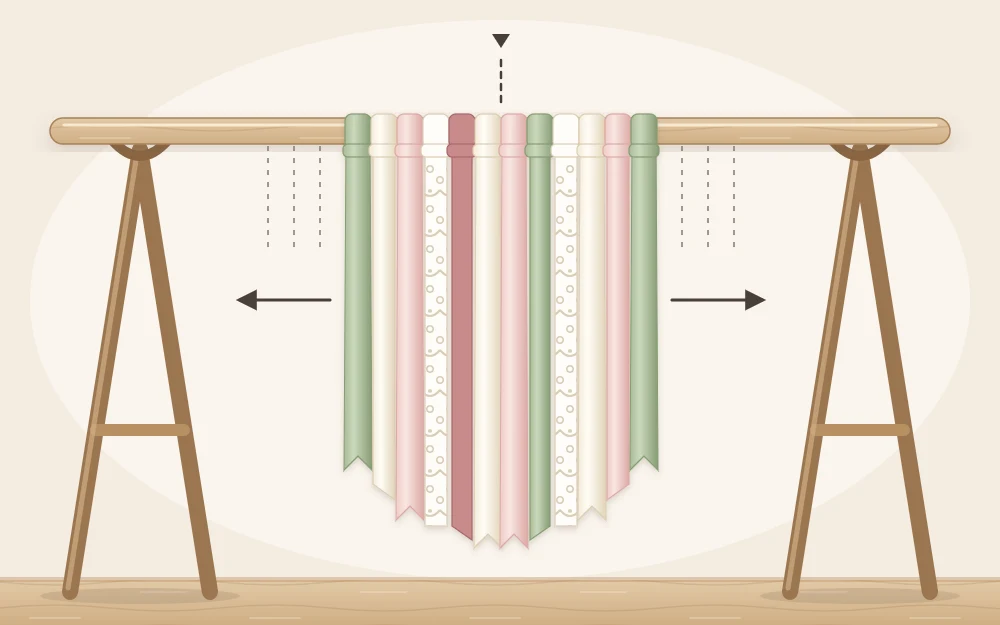
- Fold a tulle strip in half. Pass the loop behind the bar, pull both tails through the loop and tighten. Place this first knot at the center mark.
- Add the other tulle strips to the left and right in turn, about 6 in apart, until all 12 are on. Working outward from the middle keeps both halves even.
- Tie one cotton strip into each gap, beside the tulle.
- Tie one ribbon into the space that is left, so the order along the bar repeats: tulle, cotton, ribbon.
- Slide the knots until they sit about 2 in apart, then lift the ribbon tails forward so they lie in front of the sheer fabric.
Tip
Spread the colors as you go instead of sorting them at the end. Laying the ribbons out in their final order on the floor first takes about five minutes and avoids retying.
Trim the Bottom Edge
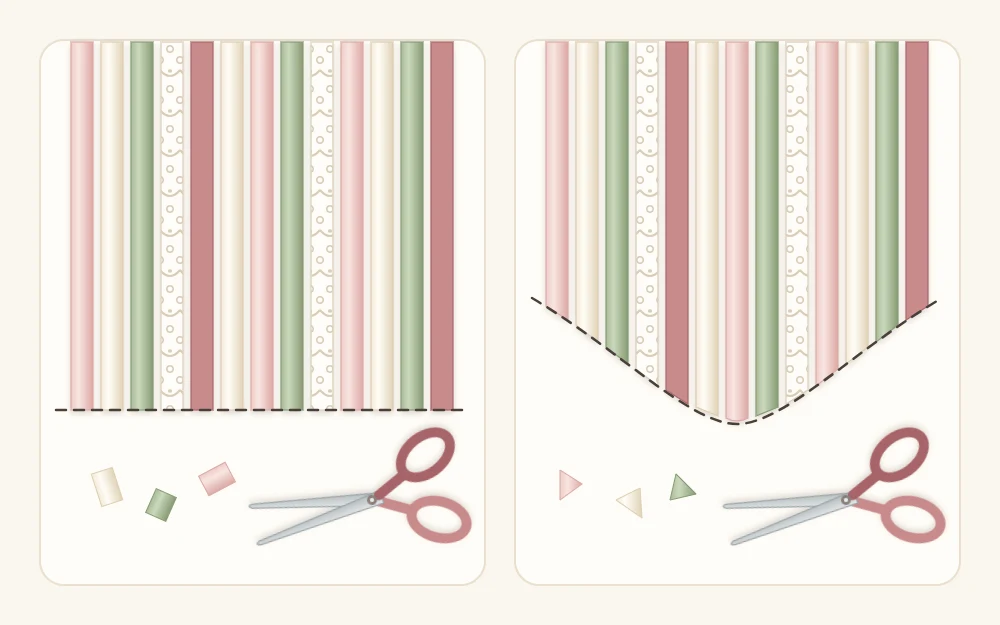
Hang the bar at its final height before trimming, because fabric strips relax and lengthen slightly once they hang. Then pick one of two finishes.
- Level: cut every tail about 1 in above the floor so nothing drags or gets stepped on.
- Soft point: leave the center tails at full length and shorten each knot’s pair by about 1 in as you move outward. With 18 knots on each side, the outer edges end up about 18 in (46 cm) shorter than the middle.
Cut ribbon ends at an angle. Torn cotton and tulle can be left as they are.
Finish the Top
The row of knots is the least attractive part, and it sits right at eye level. A swag of faux or fresh greenery tied along the bar with ribbon hides it completely. Fresh greenery is best added a day ahead or on the morning itself.
For a softer look, wire three or five paper blooms to one corner of the swag instead of spreading them evenly. They weigh almost nothing and can be made months ahead; see where paper flowers work best at a wedding for choosing sizes and paper.
Hang It Safely and Move It Without Tangles
Safety note
Hang the curtain only from a support meant for the job: a backdrop stand, a pipe frame or sturdy removable hooks. Keep the piece light, place it away from heaters and open flames, and ask the venue what is allowed before you plan where it goes.
Outdoors, a breeze will lift the strips. Tie a few of the back tails loosely to the base of the stand, or knot them around a second light dowel that rests on the ground, so the curtain keeps its shape while the front ribbons still move.
The whole curtain can be finished weeks ahead. To transport it, gather the tails into four loose bunches, tie each with a scrap of ribbon, and roll the bar up in a clean sheet. At the venue, unroll it, shake the strips out and comb them straight with your fingers. Allow about 20 minutes for hanging and adjusting.
Frequently asked questions
How many strips does a ribbon backdrop need?
Plan on one knot roughly every two inches of width when you mix wide sheer fabric with cotton strips and ribbon. A curtain six feet wide therefore takes about 36 strips. Every strip is folded over the bar, so each one gives two hanging tails and the curtain looks fuller than the count suggests.
What can I hang a ribbon backdrop from?
Use a support made for the purpose, such as a backdrop stand, a pipe frame or sturdy removable hooks, and keep the curtain light. Always ask the venue what they allow before you decide on a spot, since many have rules about walls, ceilings and outdoor structures.
How do I stop the backdrop from tangling in transport?
Gather the hanging tails into four loose bunches and tie each one with a scrap of ribbon, then roll the bar and the bunches together inside a clean sheet. When you unroll it, untie the bunches, shake the strips out and straighten them with your fingers before trimming.