DIY Wedding Card Box From a Plain Box, Fabric and Ribbon
Turn a plain lidded box into a fabric-covered card box: where to mark the slot, how big to cut the fabric, how to wrap neat corners and how to finish with ribbon so it still opens.
Project at a glance
Materials
- Sturdy lidded cardboard or papier-mache box
- About 1 yd of light cotton or linen fabric
- White (PVA) glue and a flat brush, or double-sided tape
- 2 1/2 yd of 1 1/2 in ribbon and 1 yd of 3/8 in ribbon
- Craft knife, metal ruler and cutting mat
- Scissors, pencil and a scrap of cardstock for a tag
Guests arrive with envelopes, and those envelopes need one obvious, tidy place to go. A diy wedding card box solves that with a plain lidded box, a piece of fabric and a length of ribbon, and it looks like part of the decor instead of an afterthought.
Because the lid and base are covered separately, the box still opens normally. That matters twice: once when you empty it, and again when you keep using it for cards and small mementos afterwards.
Choose the Box and Covering
Look for a sturdy cardboard or papier-mache box with a separate lid, roughly 12 x 10 x 8 in (30 x 25 x 20 cm). Check that the lid lifts off easily, because fabric adds a little thickness to the rim.
Light, tightly woven fabric such as cotton or linen is easiest to glue. Decorative paper also works and gives sharper corners, though it creases if handled roughly. You will also need:
- About 1 yd (0.9 m) of fabric, or three large sheets of decorative paper
- White (PVA) glue and a flat brush, or double-sided tape
- About 2 1/2 yd (2.3 m) of ribbon 1 1/2 in (4 cm) wide, and 1 yd of ribbon 3/8 in (1 cm) wide
- A pencil, a metal ruler, a craft knife and a self-healing cutting mat
- Scissors and a small piece of cardstock for a tag
Mark and Cut the Card Slot
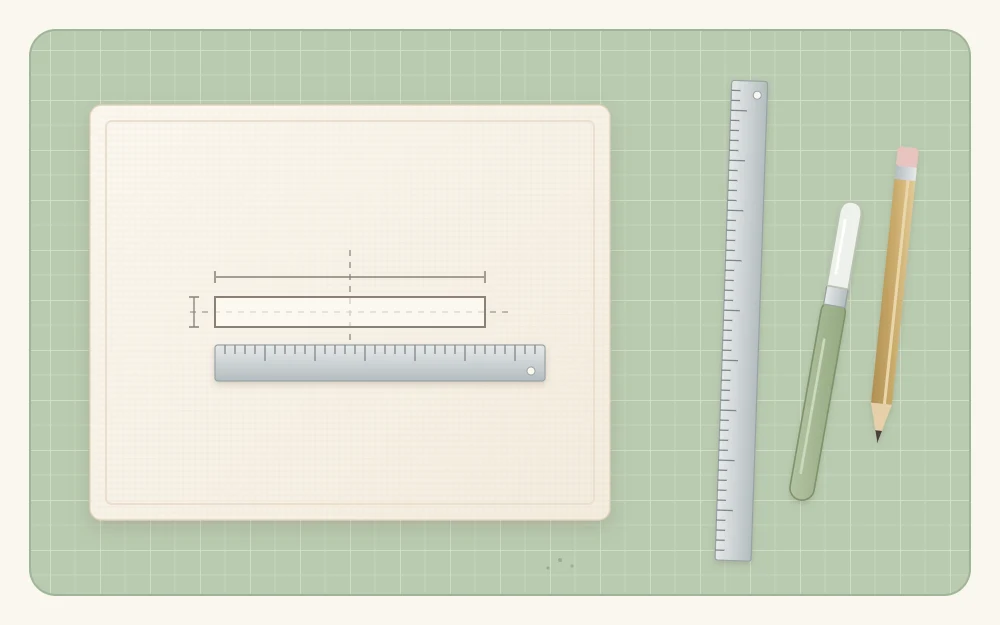
Cut the slot before covering anything, while pencil lines are easy to see. A slot about 7 x 3/4 in (18 x 2 cm) takes most greeting card envelopes fed in short edge first. Lengthen it to 8 in (20 cm) if you expect oversized cards.
- On a 12 x 10 in lid, measure 2 1/2 in (6.5 cm) in from each short edge and 4 5/8 in (11.7 cm) in from each long edge. Join the marks into a centered rectangle.
- Turn the lid right side up on the cutting mat and pack a stack of scrap cardboard underneath, so the top is supported from below.
- Hold the metal ruler along one long line and draw the knife toward you in several light passes instead of one heavy cut. Repeat on the other three sides and push the strip out.
- Smooth any rough edges with a fine nail file or sandpaper.
Safety note
Keep the hand that holds the ruler behind the blade’s path, and cap or retract the blade whenever you put the knife down. A thin cardboard lid can be cut with sharp pointed scissors instead, starting from a small hole pierced at one end of the slot.
Cover the Base
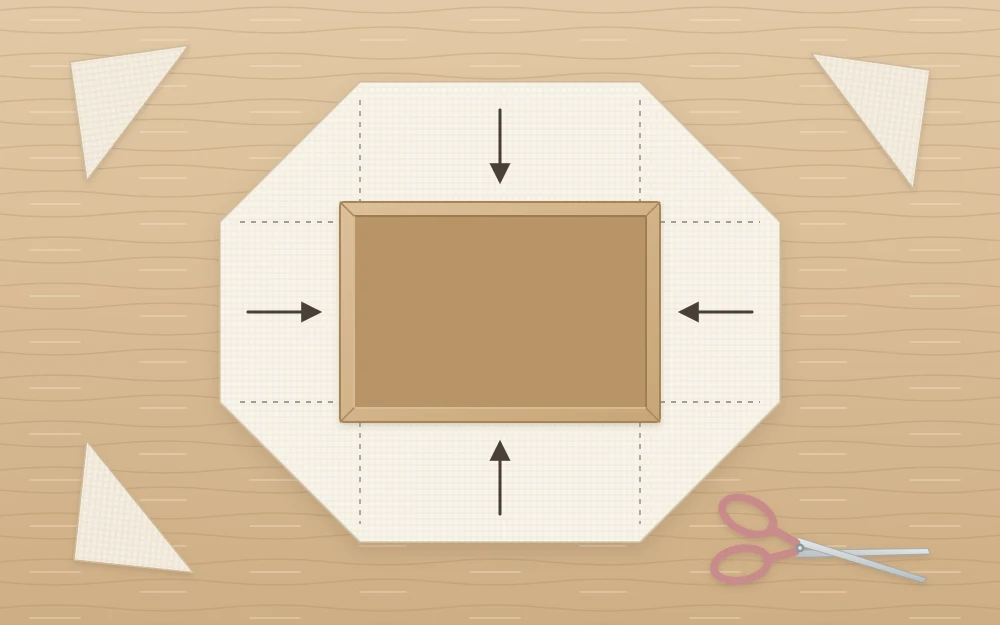
For the base, cut fabric to 30 x 28 in (76 x 71 cm). That is the bottom of the box, plus 8 in up each side, plus 1 in (2.5 cm) all around to turn over the rim.
- Brush a thin, even coat of glue on the bottom of the box and set it in the center of the fabric, wrong side up. Turn it over and smooth out any bubbles.
- At each corner, cut away the loose square of fabric with a diagonal cut that stops about 1/2 in (13 mm) from the box corner.
- Glue the two long sides up first. Wrap the small corner allowance around onto the short sides.
- On the short sides, fold the raw side edges under so the fold lines up with the box corner, then glue the panel up over the allowance.
- Snip the fabric at each top corner, turn the extra 1 in over the rim and glue it inside.
Thin coats matter more than strong glue here. Too much white glue soaks through light fabric and dries as a dark patch, so test on a scrap first. The guide to choosing an adhesive for fabric on cardboard compares the options if your fabric is sheer or textured.
Cover the Lid and Line the Slot
Measure the lid’s top and the depth of its rim, then cut fabric that covers the top and both rims with 1 in extra on every side. For a 12 x 10 in lid with a 1 1/2 in rim, that is 17 x 15 in (43 x 38 cm). Cover it exactly like the base.
When the glue has set, feel for the slot through the fabric. Snip a line down its center, stopping 1/2 in from each end, then cut diagonally into the four corners. Fold the flaps through to the inside and glue them flat.
Frame the opening with the narrow ribbon: two long pieces first, then two short ones that overlap them at the corners. The ribbon hides any fraying and gives guests a clear target.
Add the Ribbon Band, Bow and Tag
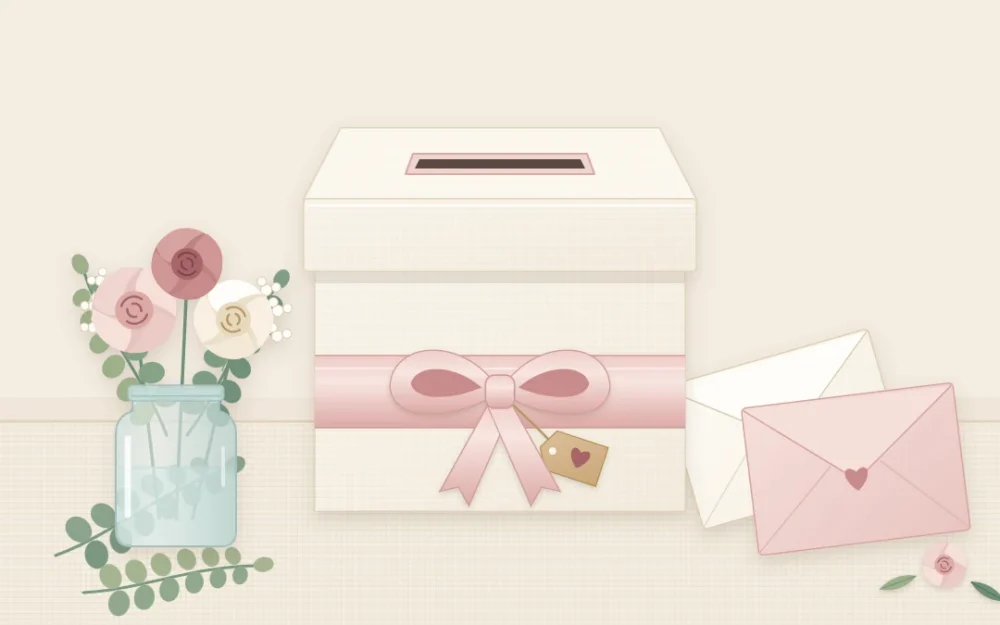
Wrap the wide ribbon around the base only, below the edge of the lid, so the box still opens. The distance around a 12 x 10 in box is 44 in (112 cm); cut 45 in and overlap the ends at the back with double-sided tape.
Tie a separate bow from about 30 in (76 cm) of the same ribbon and fix it over the front of the band with a few stitches or a dot of glue. Finish with a small cardstock tag carrying your own wording, or a tiny bundle of dried or faux flowers tucked behind the knot.
If the box will sit some distance from the entrance, a small sign beside it helps. You can letter one the same way as a hand-lettered welcome sign, just smaller.
Two Alternatives Without Cutting
- Lidded basket: tie a wide ribbon around the body, add a bow and a tag, and prop the lid half open so guests can drop cards in.
- Wooden crate: line it with a rectangle of fabric large enough to fold over the edges by 2 in (5 cm), and tie ribbon or twine around the outside to hold the liner in place.
Both suit a table that also holds a handmade guest book alternative, since open containers and pens need the same kind of space.
Keeping the Box Afterwards
The finished box can be made weeks or months ahead and stored dry and out of sunlight, with tissue paper inside so the lid does not get pressed in. Afterwards it becomes a keepsake box: cards, a ribbon from the bouquet, a place card and a copy of the invitation all fit inside.
Frequently asked questions
How big should the slot in a card box be?
A slot of about 7 inches long and three quarters of an inch wide takes most greeting card envelopes when they are fed in short edge first, and it is narrow enough that cards cannot easily be lifted back out. Make it 8 inches long if you expect large cards.
What size box works for a wedding card box?
A lidded box of roughly 12 by 10 by 8 inches suits most celebrations and still fits on a shelf afterwards. For a larger guest count, go a little taller instead of wider, so the box keeps a small footprint on the table and the slot stays centered.
Can I cover the box with paper instead of fabric?
Yes. Decorative paper gives crisp corners and needs only a glue stick or double-sided tape, which avoids the damp patches wet glue can leave. It is less forgiving than fabric on curved or dented boxes, so smooth it from the center outward and work on one side at a time.