How to Tie a Bow With Ribbon: 3 Neat Styles for Wedding Crafts
Three bows with exact steps: a classic two-loop bow that lies level, a flat tailored bow with a cutting list, and a wired multi-loop bow, plus ribbon amounts and tail finishes.
Project at a glance
Materials
- Satin or grosgrain ribbon, about 24 in per classic bow
- 14 in of 5/8 in ribbon per tailored bow
- About 60 in of 1 1/2 in wired-edge ribbon per multi-loop bow
- Floral wire and wire cutters
- Sharp scissors
- Tacky glue or foam adhesive dots
- Clear-drying glue or fray sealant
A bow that tilts to one side or shows the dull back of the ribbon is rarely a ribbon problem. It is almost always one small move made in the wrong direction, and once you know which move, every bow comes out the same.
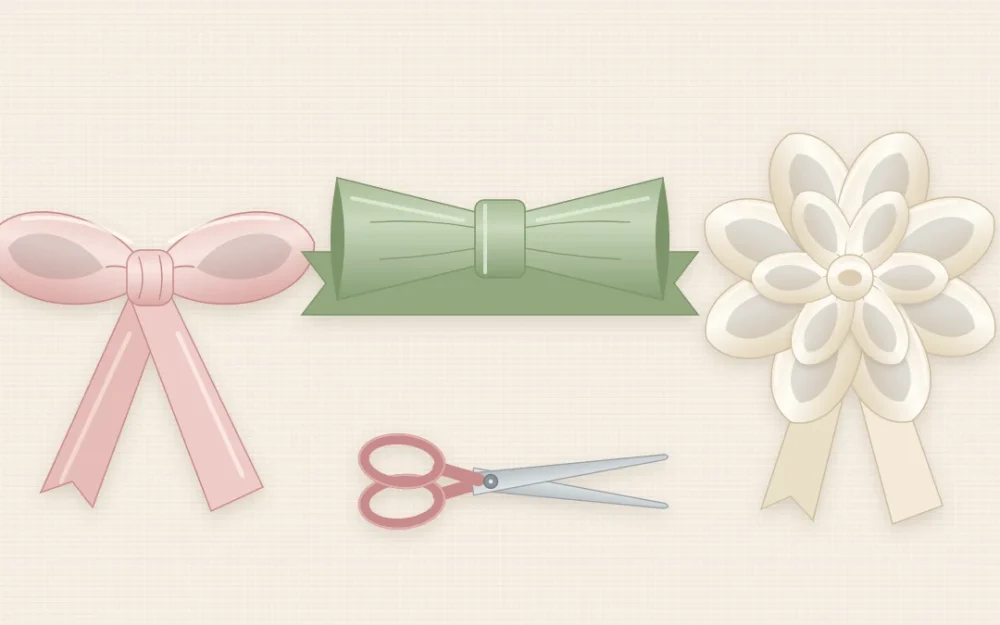
This guide covers how to tie a bow with ribbon in three styles that wedding crafts use again and again: the classic two-loop bow, a flat tailored bow, and a full multi-loop bow for larger decor. Practice each one on a scrap length before you cut your good ribbon.
Choose a ribbon that suits the bow
The same steps behave differently in different types of ribbon, so match the ribbon to the job.
- Satin is smooth and soft, and it slides while you tie. Double-faced satin is shiny on both sides, which hides a twisted loop.
- Grosgrain has fine ribs that grip, so knots stay put. It is the easiest choice for tailored bows, tags and cards.
- Organza and other sheer ribbons are light and airy. Narrow loops collapse, so choose a wide ribbon or layer it over satin.
- Wired-edge ribbon has a fine wire in each edge and stays where you shape it. It is the best choice for multi-loop bows and chair backs.
How much ribbon a bow needs
Bows use more ribbon than they seem to. As a rough guide, a classic bow takes about six times its finished width, with tails about as long as the bow is wide. A bow 4 in (10 cm) wide needs about 24 in (60 cm), plus whatever length goes around the box, jar or chair.
A multi-loop bow needs about ten times its finished width. The tailored bow has an exact cutting list, given below.
Tip
Tie one test bow on the real object, untie it and measure the ribbon you used. Multiply that length by the number of bows, then add about one bow in ten as spares before you work out how many rolls to get.
The classic two-loop bow
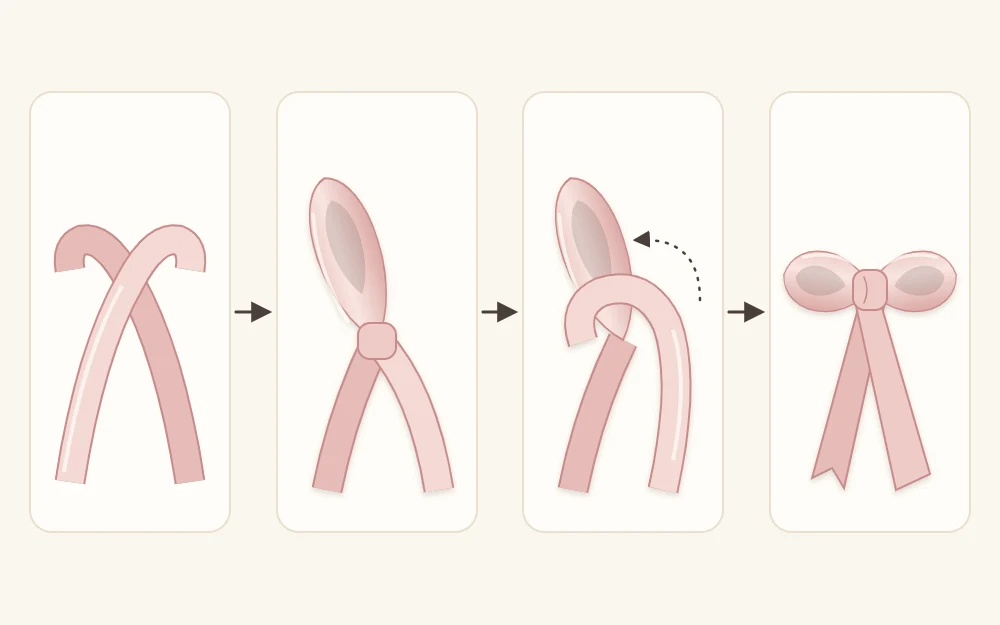
A crooked bow comes from wrapping the second end the wrong way around the first loop. Follow the direction in step 3 and the knot lies flat.
- Cross the left end over the right end, tuck it under and pull snug. One end now points up and one points down.
- Fold the lower end into a loop and hold it at the base with your thumb. If the ribbon has a dull side, keep the shiny side facing out.
- Bring the upper end down over the front of the loop, then around behind it. This front-then-back wrap is the step that keeps the bow level.
- Push that end, folded into a second loop, through the small gap behind your thumb. Give it a half twist as it goes through so its shiny side faces out too.
- Pull both loops sideways at the same time, slowly. Tug the loops to tighten and the tails to shrink the loops until both sides match.
The flat tailored bow
This bow is not tied at all, so every one in a batch is identical. It suits cards, tags and anything that has to lie flat. For a bow 3 in (7.5 cm) wide in ribbon about 5/8 in (16 mm) wide, cut three pieces: 7 in (18 cm) for the loop, 5 in (13 cm) for the tails and 2 in (5 cm) for the center band. That is 14 in (36 cm) per bow.
- Bring the two ends of the long piece to the middle so they overlap by about 1 in (2.5 cm) and fix them with a dot of tacky glue. You now have a flat loop 3 in wide with the join at the center back.
- Pinch the center into a small pleat.
- Lay the tail piece behind the pinch, at a slight angle if you like.
- Wrap the short band around the pinched center and the tails, and glue its ends together at the back. Hold for about a minute.
To resize, cut the loop piece to twice the finished width plus 1 in for the overlap.
The layered multi-loop bow
This full bow for larger decor is about 6 in (15 cm) wide and uses roughly 60 in (1.5 m) of wired-edge ribbon 1 1/2 in (4 cm) wide, plus a short piece of floral wire.
- Leave an 8 in (20 cm) tail, then pinch the ribbon between thumb and finger. This pinch is the center of the bow.
- Make a loop about 3 in long on one side and bring the ribbon back to the pinch. Twist it half a turn at the center so the right side stays outward.
- Make a matching loop on the opposite side and twist again.
- Repeat until there are three loops on each side, making the last pair a little shorter so the layers show.
- Leave a second 8 in tail and cut. Wrap floral wire tightly around the center, twist it at the back and turn the cut ends inward.
- Pull the loops apart and open each one with a finger. Knot a short ribbon scrap over the wire to hide it.
Finishing the tails
Cut tails last, with sharp scissors, in one clean snip. An angled cut is the quickest. For a V cut, fold the tail in half lengthwise and cut from the folded side up toward the open edges.
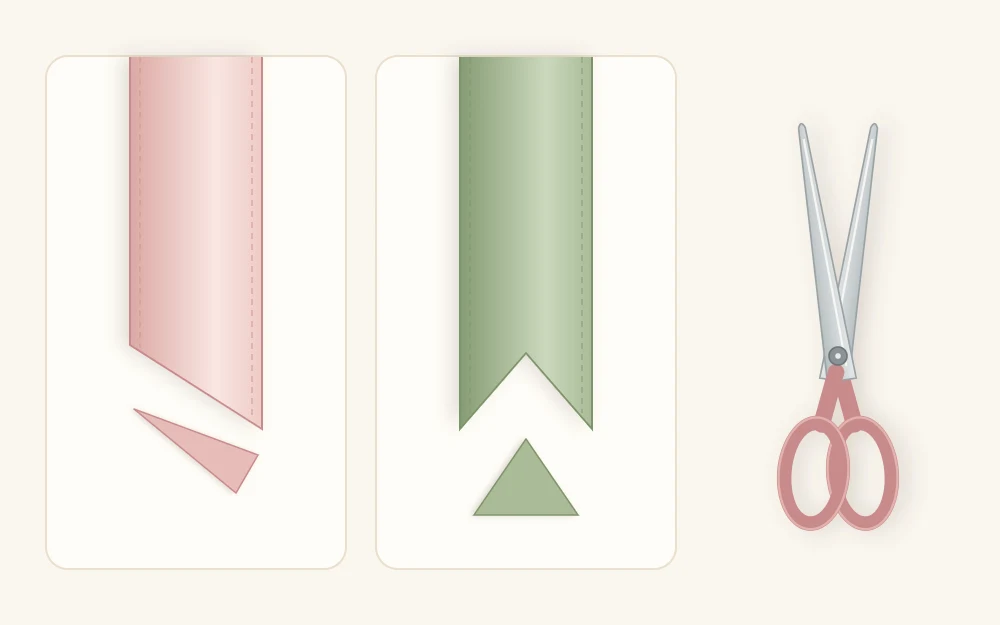
Satin and organza fray quickly. Run a very thin line of clear-drying glue or fray sealant along the cut edge with a toothpick and let it dry for about ten minutes.
Attaching a bow to your project
- Glue: tacky glue or a foam adhesive dot for paper and card. A low-temperature glue gun is quicker on jars, wood and fabric.
- Wire: leave the floral wire ends long on a multi-loop bow and twist them around a hoop, garland or sign corner.
- A stitch: two or three stitches through the back of the knot hold a bow on fabric, such as fabric favor pouches, and can be snipped out later.
Safety note
Low-temperature hot glue can still burn. Press ribbon into it with a craft stick instead of a fingertip, and rest the gun on its stand between bows.
The classic bow is the one to use on ribbon chair sashes, where a wide sash simply scales the same steps up, and it is the usual finish for a ribbon-wrapped bouquet handle.
Frequently asked questions
Why does my bow always come out crooked?
The second ribbon end has gone around the first loop in the wrong direction, which turns the knot so one loop points up and the other down. Make the first loop with the lower end, then take the upper end down across the front and around the back before pushing it through.
What ribbon is easiest for a beginner to tie?
Grosgrain and wired-edge ribbon are the most forgiving. Grosgrain grips itself, so the knot does not slip while you adjust the loops, and wired-edge ribbon can be reshaped after tying. Single-faced satin is the trickiest because it slides and shows its dull side when a loop twists.
How do I keep ribbon ends from fraying?
Cut the tails with sharp scissors at an angle or into a V, then seal the cut edge with a very thin line of clear-drying glue or fray sealant applied with a toothpick. Let it dry before handling and test on a scrap first, since some products leave a darker edge.