DIY Wedding Favor Bags From Fabric or Paper
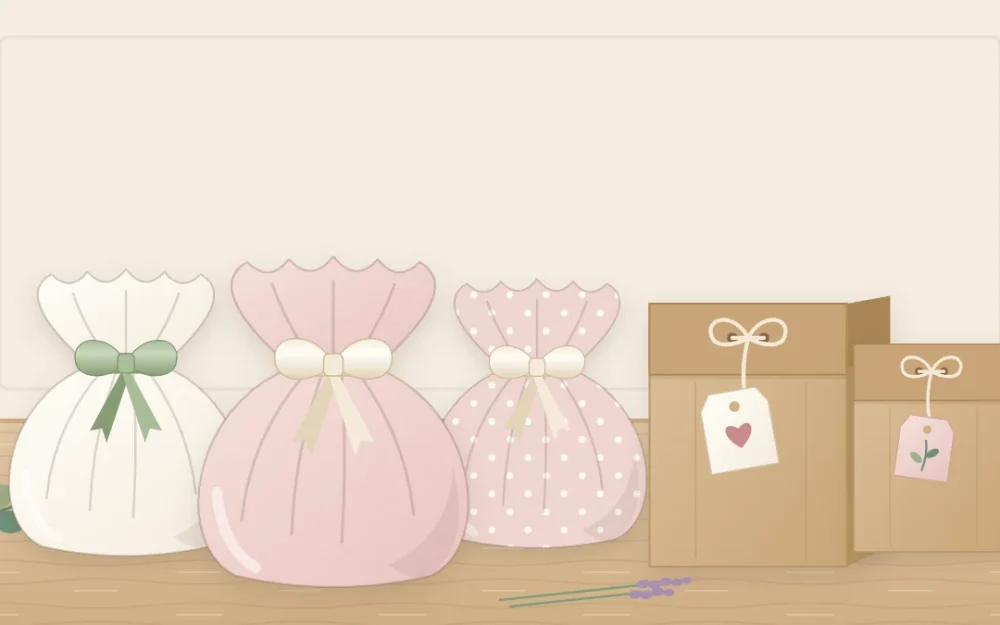
Three simple favor bags to make by hand: a no-sew gathered pouch from a fabric circle, a flat glued or sewn pouch, and a paper bag folded around a small box.
Project at a glance
Materials
- Light cotton, tulle or organza
- Pinking shears and scissors
- Narrow ribbon, 1/4 to 3/8 in wide
- Fabric glue or needle and thread
- Kraft or text-weight paper
- Glue stick or double-sided tape
- Small box to use as a former
Some favors do not suit a box. A handful of wrapped sweets, a scoop of dried lavender or a flat seed packet sits better in something soft or simple: a gathered fabric pouch, a small flat bag, or a folded paper bag with a tag on top.
These diy wedding favor bags need no pattern and almost no equipment. Two are made from fabric, one from paper, and all three can be finished weeks ahead and filled later.
Which Bag Suits Which Favor
- Gathered circle pouch: loose or lumpy contents, such as a few purchased wrapped sweets or a small round keepsake.
- Flat fabric pouch: dried lavender, a seed packet or anything flat and light.
- Paper bag: small wrapped items that should stand upright on a table, with a tag closing the top.
Keep the contents wrapped or dry. Unwrapped sweets should not sit directly against fabric or paper, and anything damp will mark both. If you are still choosing what goes inside, this list of handmade favor ideas is sorted by effort.
Materials
- Light cotton, tulle or organza
- Pinking shears (zigzag-edged scissors) and ordinary scissors
- Narrow ribbon, 1/4 to 3/8 in (6 to 10 mm) wide
- Fabric glue, or a needle and thread
- Kraft paper or text-weight paper, letter size
- Glue stick or double-sided tape
- A small box to use as a former, about 2 1/2 in wide and 1 1/4 in deep (6.5 x 3 cm)
No-Sew Gathered Fabric Pouch
- Draw a 9 in (23 cm) circle on the fabric by tracing around a dinner plate or a pan lid of about that size.
- Cut it out with pinking shears. The zigzag edge slows fraying on cotton and looks decorative when gathered. Tulle and organza do not need it.
- Place the favor in the center of the circle.
- Gather the fabric up around it, pinching it together just above the contents so a ruffle of about 2 in (5 cm) stands above your fingers.
- Wind a 14 in (36 cm) length of ribbon twice around the pinch, pull firm and tie a knot, then a bow.
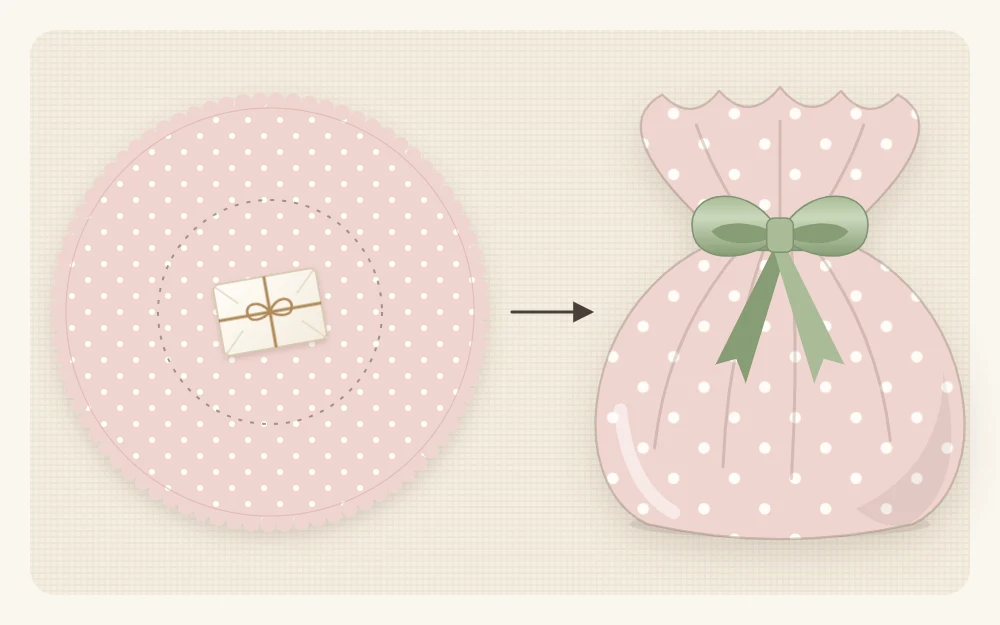
For tulle or organza, stack two circles so the pouch looks fuller and the contents show less. Very fine contents such as lavender buds escape through tulle, so use cotton for those, or the flat pouch below. If your bows come out crooked, the guide to tying a neat ribbon bow shows the fix.
Flat Fabric Pouch From One Rectangle
This pouch finishes at about 4 x 5 in (10 x 13 cm) and can be glued or sewn.
- Cut a 4 x 10 in (10 x 25 cm) rectangle of light cotton. Trim both short ends with pinking shears; these become the top edge.
- Fold it in half, short ends together and the right side of the fabric facing out, so the fold forms the base.
- Run a thin line of fabric glue down each long side, about 1/4 in (6 mm) from the edge, and press the layers together. Or stitch the two sides with a small running stitch or a sewing machine.
- Let glued seams dry flat for about an hour, or as long as the glue label advises.
- Trim the side edges with pinking shears, just outside the seam, for a neat zigzag border.
- Fill the pouch no more than two-thirds full and tie a ribbon around the neck, about 1 in (2.5 cm) below the top.
Tip
Slip a strip of scrap paper inside the pouch while the glue dries. It stops any glue that seeps through from sticking the front to the back.
Folded Paper Bag Around a Box
A small box acts as a former: you wrap the paper around it as if wrapping a gift, close one end only, and slide the box out. Half a letter-size sheet makes one bag.
- Cut a letter-size sheet in half across its length to get two pieces of 8 1/2 x 5 1/2 in (21.5 x 14 cm).
- Lay one piece face down with a long edge toward you. Stand the former on it so about 1 in of paper extends beyond the base of the box.
- Wrap the paper around the box. The ends should overlap by roughly 1 in at the middle of the back. Stick the overlap with a glue stick or double-sided tape, keeping glue off the box.
- Close the base like the end of a wrapped gift: press the two short sides in, crease the triangles that form, fold the top flap down and the bottom flap up, and glue them.
- Press the base firmly on the table for a few seconds, then slide the box out.
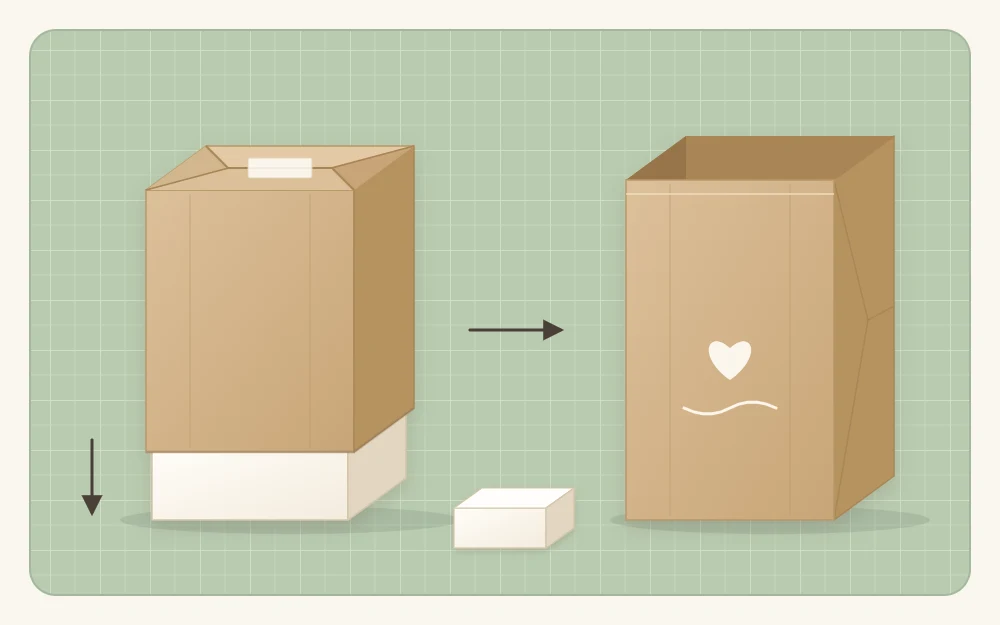
The bag stands about 4 1/2 in (11.5 cm) tall before the top is folded. For a different size, cut the paper as wide as the distance around your former plus 1 in, and as tall as the bag you want plus the depth of the former.
To close it, fill the bag, fold the top over by about 3/4 in (2 cm), punch a hole through all layers and tie on a tag. The tutorial for hand-cut favor tags has four shapes that fit this fold.
How Much Fabric, Ribbon and Paper
Work from your favor count plus about 10 percent for spares.
- Circles: fabric about 44 in (112 cm) wide gives four 9 in circles across and four rows per yard, so 16 pouches per yard. For 110 pouches, get 7 yd (6.4 m).
- Flat pouches: the same width gives 10 rectangles across, with a little to trim, and three rows per yard: 30 pouches per yard. For 110, get 4 yd (3.7 m).
- Ribbon: at 14 in each, 110 ties need 1,540 in, or about 43 yd (39 m).
- Paper: two bags per sheet, so 55 sheets for 110 bags.
Making Ahead and Storing
Empty pouches and paper bags can be made weeks or months ahead. Store fabric pouches flat in a box with the ribbons cut and bundled beside them, and nest paper bags inside one another in short stacks so they keep their shape. Keep everything dry and out of sunlight.
Fill the bags in the last few days. Dried lavender holds its scent best when it stays sealed in its original container until then, and sweets should stay in their own wrappers and be packed last of all.
Frequently asked questions
What fabric is best for wedding favor bags?
Light cotton is the easiest to cut, glue and tie, and it hides the contents. Organza and tulle look airy and let the favor show through, but they are slippery and let fine contents escape, so use two layers and keep them for larger wrapped items rather than loose lavender or seeds.
Can I make favor bags without sewing?
Yes. The gathered pouch is only a fabric circle tied with ribbon, and the flat pouch can be closed with a thin line of fabric glue along each side instead of stitches. Let glued seams dry fully before filling, and avoid overfilling, since a glued seam is less forgiving than a sewn one.
How big should a fabric circle be for a favor pouch?
A 9 inch circle holds a small handful of wrapped sweets or a keepsake of about 2 inches across, with a ruffle above the ribbon. For anything larger, wrap a test favor in scrap fabric, mark where the ruffle should end and measure across; that distance is the circle size you need.