How to Wrap a Wedding Bouquet With Ribbon
Turn the bare stems of a hand-tied bouquet into a smooth ribbon handle. Step-by-step wrapping, a pinned or tied finish, four handle styles and how much ribbon you need.
Project at a glance
Materials
- Hand-tied bouquet with bound stems
- Floral tape
- 2 to 3 yd of 1 1/2 in satin or grosgrain ribbon
- 2 or 3 pearl-headed pins
- Floral snips and scissors
- Clean towel
A hand-tied bouquet looks finished the moment its stems disappear under a smooth band of ribbon. Learning how to wrap a wedding bouquet takes about ten minutes of practice, and the method is the same whether the flowers came from a florist or from your own kitchen table.
The wrap also does a practical job. It covers the tape at the binding point, gives a comfortable handle and keeps damp stems away from hands and clothes.
What You Need
- A hand-tied bouquet with its stems already bound
- Floral tape and sharp floral snips
- 2 to 3 yd (1.8 to 2.7 m) of satin or grosgrain ribbon, 1 1/2 in (4 cm) wide
- Two or three pearl-headed pins, about 1 1/2 in long
- Scissors and a clean towel
Satin gives a smooth, dressy handle. Grosgrain has a fine rib that grips itself, which makes it more forgiving on a first attempt.
Prepare the Stems
- Tape the binding point. Hold the bouquet where it is tied, just under the flower heads. Wind floral tape around that point four or five times, stretching the tape gently as you go so it clings to itself.
- Trim the stems level. Cut straight across so the stems are about 6 to 7 in (15 to 18 cm) long below the binding point: roughly a hand’s width for the grip plus a little bare stem.
- Dry them. Take the bouquet out of the water and pat the stems thoroughly with the towel. Ribbon wrapped over wet stems shows dark patches and slips.
Remove any leaves or thorns left on the part you will wrap, so the ribbon lies flat.
Wrap the Handle Step by Step
- Lay the ribbon end flat against the stems at the binding point, pointing down, with about 1 in (2.5 cm) to tuck under.
- Wrap the ribbon once straight around the stems so it traps its own end.
- Spiral down the stems, angling the ribbon slightly and covering half the width of the previous turn each time. Keep a steady, firm pull.
- Stop about 1 in above the cut ends, or cover the ends completely if you prefer.
- At the bottom, make one level turn, then spiral back up with the same half-width overlap.
- At the top, make one last level turn over the tape. Cut the ribbon, leaving about 1 in, and fold that raw end under itself.
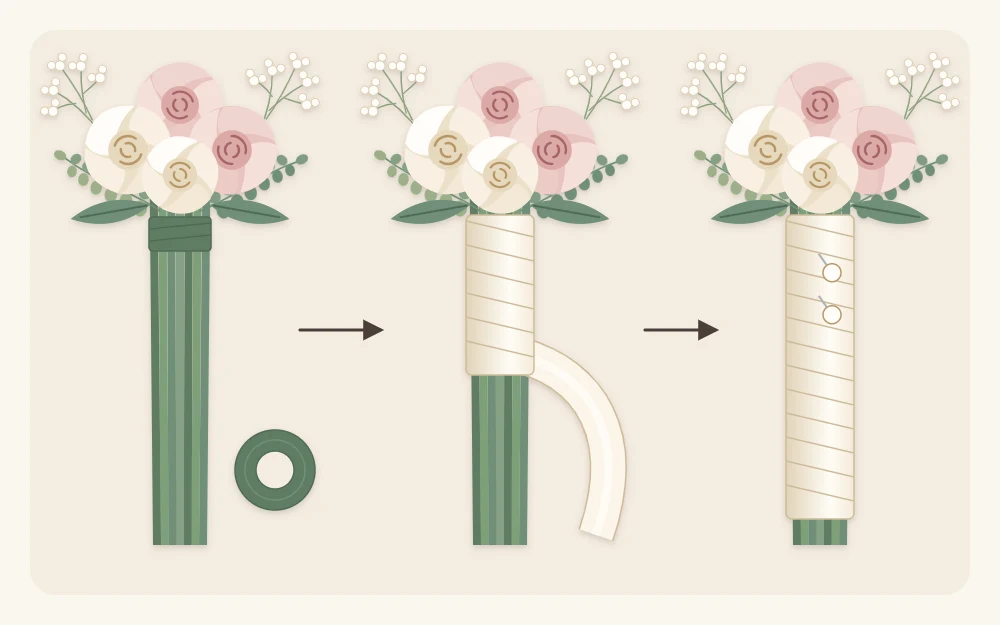
The second layer is what makes the handle look smooth. It hides any gaps from the first pass and gives the pins something thick to hold.
Finish With Pins or a Bow
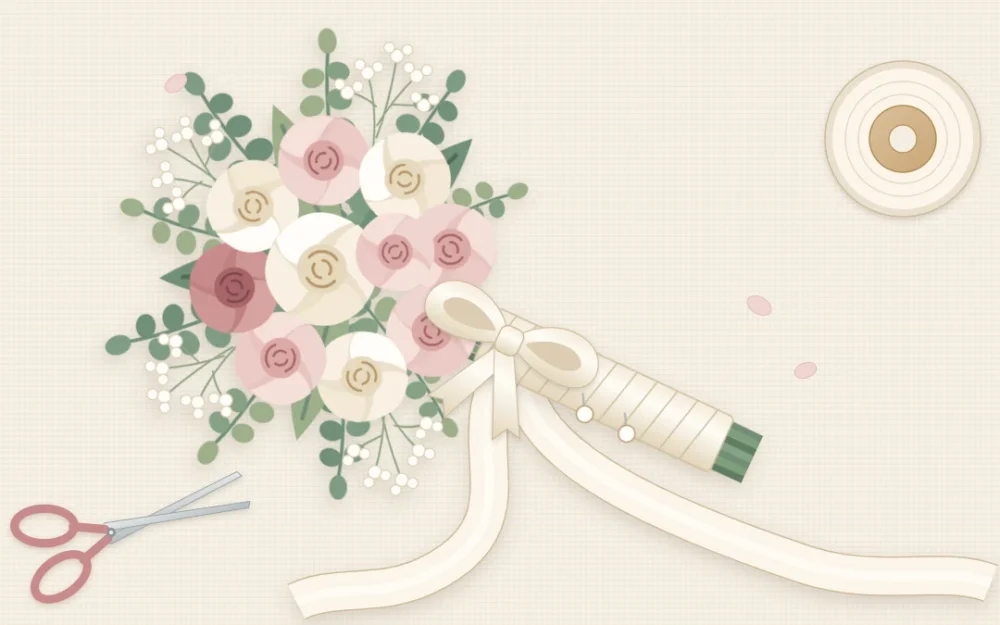
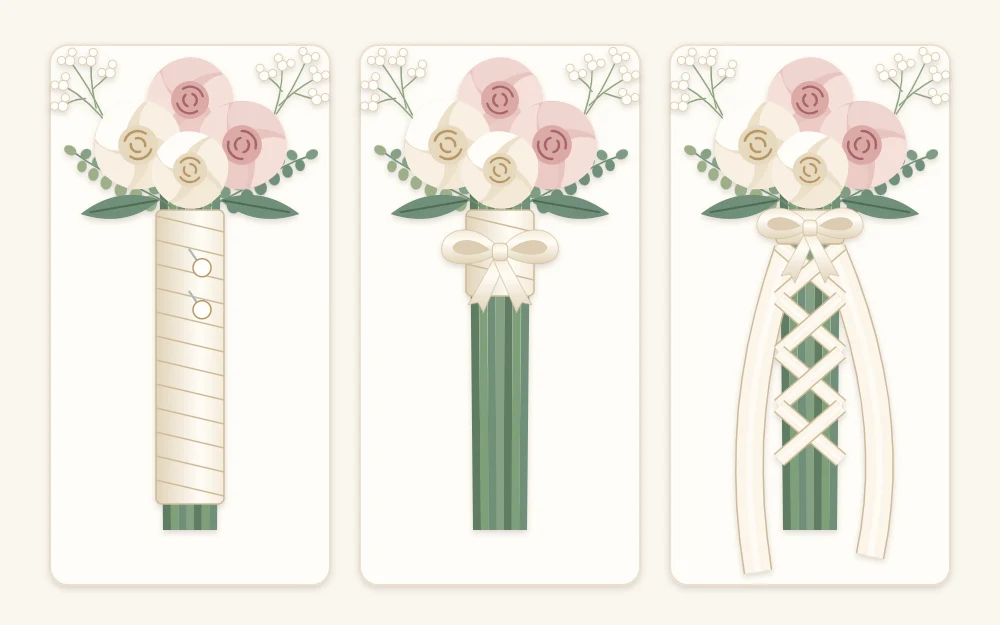
For a pinned finish, hold the folded end flat at the back of the handle. Push the first pin through the fold and upward into the stems at a steep angle, toward the flower heads, until only the pearl shows. Add a second and third pin below it in a neat line.
Safety note
Angle every pin up into the middle of the stem bundle, never straight across it. Run a fingertip around the whole handle afterward: if you feel a point anywhere, pull the pin out and set it again at a steeper angle.
For a tied finish, skip the pins. Instead of tucking the starting end under, leave a tail of about 15 in (38 cm) hanging free at the top and wrap over its base. When you spiral back up, knot the working end firmly to that tail, tie the two into a bow at the front and trim both ends at an angle. The guide to tying a neat ribbon bow shows how to keep the loops level.
Four Handle Styles
Full wrap
The method above: ribbon from the binding point almost to the cut ends. It is the tidiest choice and the most comfortable to hold for a long time.
Short collar
Wrap only the top 2 to 3 in (5 to 8 cm) below the flowers, down and back up, and leave the green stems bare beneath. This suits garden-style bouquets and uses under 1 yd (90 cm) of ribbon.
Crisscross wrap
Center a long ribbon at the back of the stems, bring both ends to the front and cross them, then take them to the back and cross again. Repeat down the handle so a row of X shapes forms at the front, then tie off at the bottom. Leave small diamonds of stem showing between the crosses.
Long trailing ribbons
Finish any wrap, then knot three or four extra ribbons of 1 to 1 1/2 yd (0.9 to 1.4 m) each around the top of the handle at their midpoints. Mixing widths and textures gives the tails more movement.
How Much Ribbon to Buy
You can estimate it from your own bouquet. Measure around the stem bundle and the length you want to cover. With 1 1/2 in ribbon and half-width overlaps, each turn moves down about 3/4 in (2 cm).
A handle 5 in (13 cm) long and about 4 in (10 cm) around takes roughly seven turns each way. That is 14 turns of 4 in, or 56 in: a little over 1 1/2 yd (1.4 m). Add 1 yd for a bow with tails and you arrive at 2 1/2 to 3 yd.
A pinned finish with no bow needs only about 2 yd. Trailing ribbons are extra, so add up their lengths separately and buy a spare yard for practice.
Timing and Keeping It Fresh
Wrap on the morning of the wedding. Until then, keep the bouquet in a vase with a few inches of water, somewhere cool and away from direct sun.
Once wrapped, stand it in a jar with only about 1 in of water so the cut ends can drink while the ribbon stays above the surface. Dry the ends with a towel before the bouquet is carried.
Tip
Practice the spiral once on a bundle of pencils or twigs of similar thickness. You will see how hard to pull and how much ribbon the handle really uses.
Matching the Other Flower Pieces
Cut an extra length from the same ribbon before you start. A few inches will finish the stems when you make a matching boutonniere, and longer offcuts can trail from a floral hoop wreath carried by an attendant or hung behind the couple.
Using one ribbon across all three pieces ties them together more reliably than trying to match every flower.
Frequently asked questions
What kind of ribbon is best for wrapping a bouquet?
Double-faced satin about 1 1/2 inches wide is the classic choice because both sides are shiny and it lies smooth. Grosgrain grips better and is easier for beginners. Avoid stiff wired ribbon for the handle itself, since the wire edges make ridges; keep it for separate trailing bows instead.
Can I wrap the bouquet the night before?
You can, but the morning is better. A wrapped handle can only stand in a very shallow amount of water, so the flowers drink less overnight and the ribbon may pick up damp marks. If you must wrap early, keep the bouquet cool and the water below the ribbon.
How do I stop the ribbon from slipping down the stems?
Dry the stems completely, start over a base of floral tape, and keep a firm, even pull on every turn. The first level turn should trap the ribbon end. Wrapping down and then back up adds grip, and pins pushed upward into the stems lock the top edge in place.